Understanding the allocation block
This block is one of the simplest to understand. As you know, the graph of a trading robot is read sequentially. In other words, you can’t move on to the next block until the block you’re in has been validated.
So when one of the indicator blocks or groups is validated, we can define the allocation we wish to give our robot on the chosen asset. This method is very interesting, as it is modular.
For example, you can either open a position with this block by switching from the 0% allocation, which means “I’m not in a position”, to any number between -500% and 500% (details below). You can also close your trade with this block by simply changing the allocation to 0%.
Buy - Sell - Leverage
Defining an allocation is fine, but understanding it is even better! Why can the allocation vary from -500% to 500%?
- Buy: if we choose a 20% allocation, this means I’m taking a buy position with 20% of the capital allocated to this strategy.
- Sell: if you choose a -20% allocation, this is equivalent to taking a short position (betting on the downside) with 20% of the capital allocated to the strategy.
- Leverage: when you exceed 100% in absolute value (-100% or 100%), this implies using leverage on the part of the broker. In other words, you’re borrowing money from the broker over a very short period to invest a larger amount (which increases your gains, but also your losses). So if you take a position with a 300% allocation, it means you’re using 300% of the capital allocated to this strategy (3 times the allocated capital).
How do I configure it?
Unlike most blocks, the allocation block contains certain optional parameters. A basic allocation is set, which remains fixed throughout the trade. However, it is also possible to increase the value of this allocation by creating a loop that passes through an allocation block several times.
For example, if we’re already in a long position and the bot wants to open a long position again, we have two possibilities:
Case 1: we keep the basic allocation of the “Allocation Percentage” parameter.
Case 2: we increase the allocation
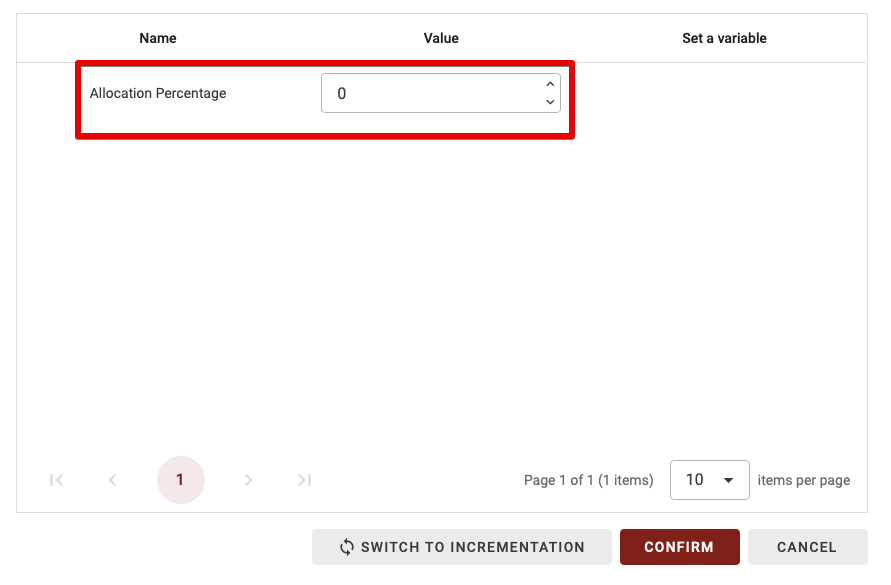
CASE 1: Fixed allocation
This is the simplest case: when we open the allocation block, we only see an “Allocation Percentage” parameter. We’ll place the percentage of our capital we wish to use on this position (which can range from à500% to 500%).
CASE 2: Incremental allocation
This block allows us to set the initial allocation, but also to vary it if we configure it differently (this creates 2 types of allocation blocks: initial allocation and incrementation).
CASE 2.1: Absolute value allocation incrementation
To switch to the incrementation section, simply click on the “Switch to incrementation” button.
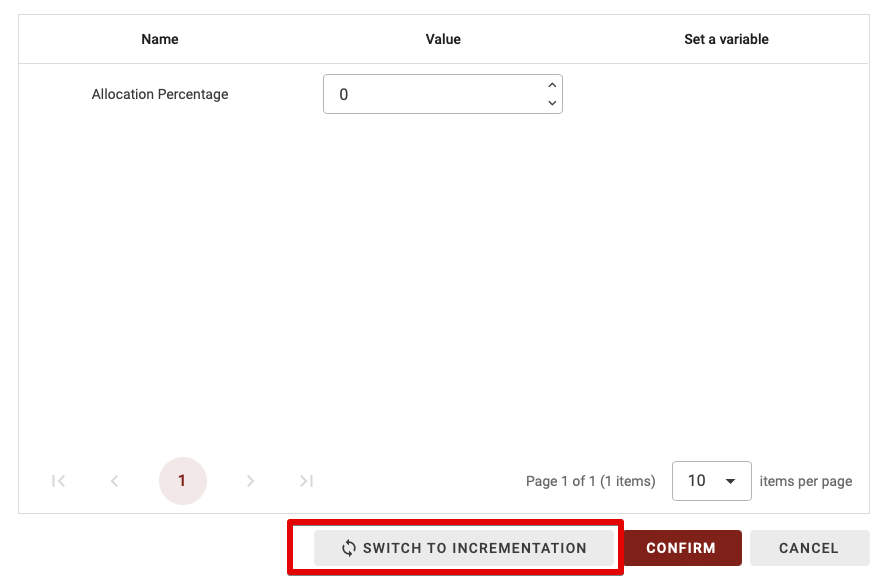
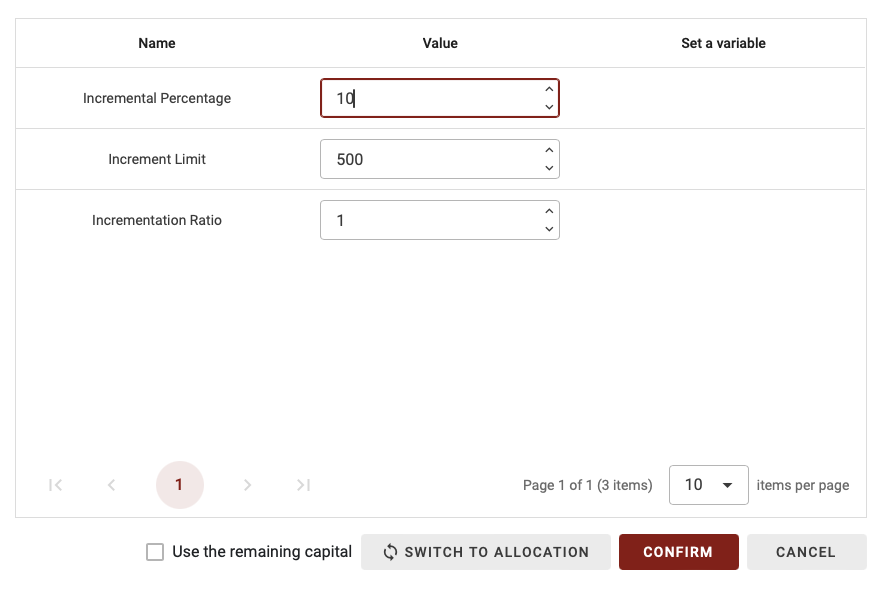
You’ll now see two new parameters:
- Incremental Percentage: the percentage by which we’re going to increase, or decrease if this value is negative, our allocation. For example, here I’ve chosen 10%.
- Increment Limit: this is the limit at which we stop increasing or decreasing our allocation. Here, I’ve chosen to keep it at 500%.
- Incrementation ratio: at each increment, you can choose to decrease the percentage of increase or to increase it. If I choose 1, at each increment I’ll add 10% to my allocation. If I choose 0.5, on the first increment, my allocation will increase by 10%, then by 10%*0.5, then by 10%*0.5*0.5,…
CASE 2.2: Incremental relative value allocation
Next, we can take a percentage of our remaining allocation if we tick the “Use the remaining capital” box.
To do this, you first need to set the “Increment Limit” parameter, which here highlights the maximum allocation you wish to make (100% max for the spot market and up to 500%, i.e. 100% leverage 5 for futures).
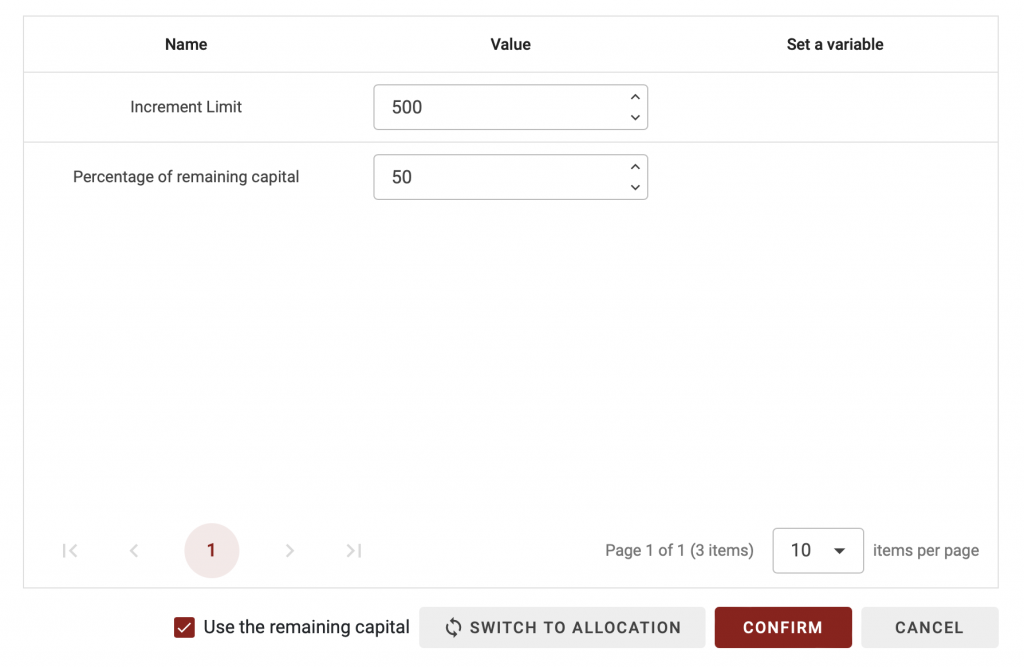
Then we set the last parameter “Percentage of the remaining capital”. Let’s say I put in 50%, and have an initial allocation of 60%, if I keep my Increment Limit at 500%, I’ll increase by (500%-60%)*50% = 220%.